1 What's an Addressable LED Strip?
Unlike a basic LED strip where every LED shows the same colour, an addressable strip lets you control each LED individually. You can make one red, the next blue, and the one after that green — all at the same time. That's what makes chasing patterns, rainbows, and animations possible.
Your strip almost certainly uses the WS2812B chip (often sold as "NeoPixel" strips). Each LED has a tiny controller built in, and they daisy-chain together on a single data wire. That's why there are only three pads at each cut point:
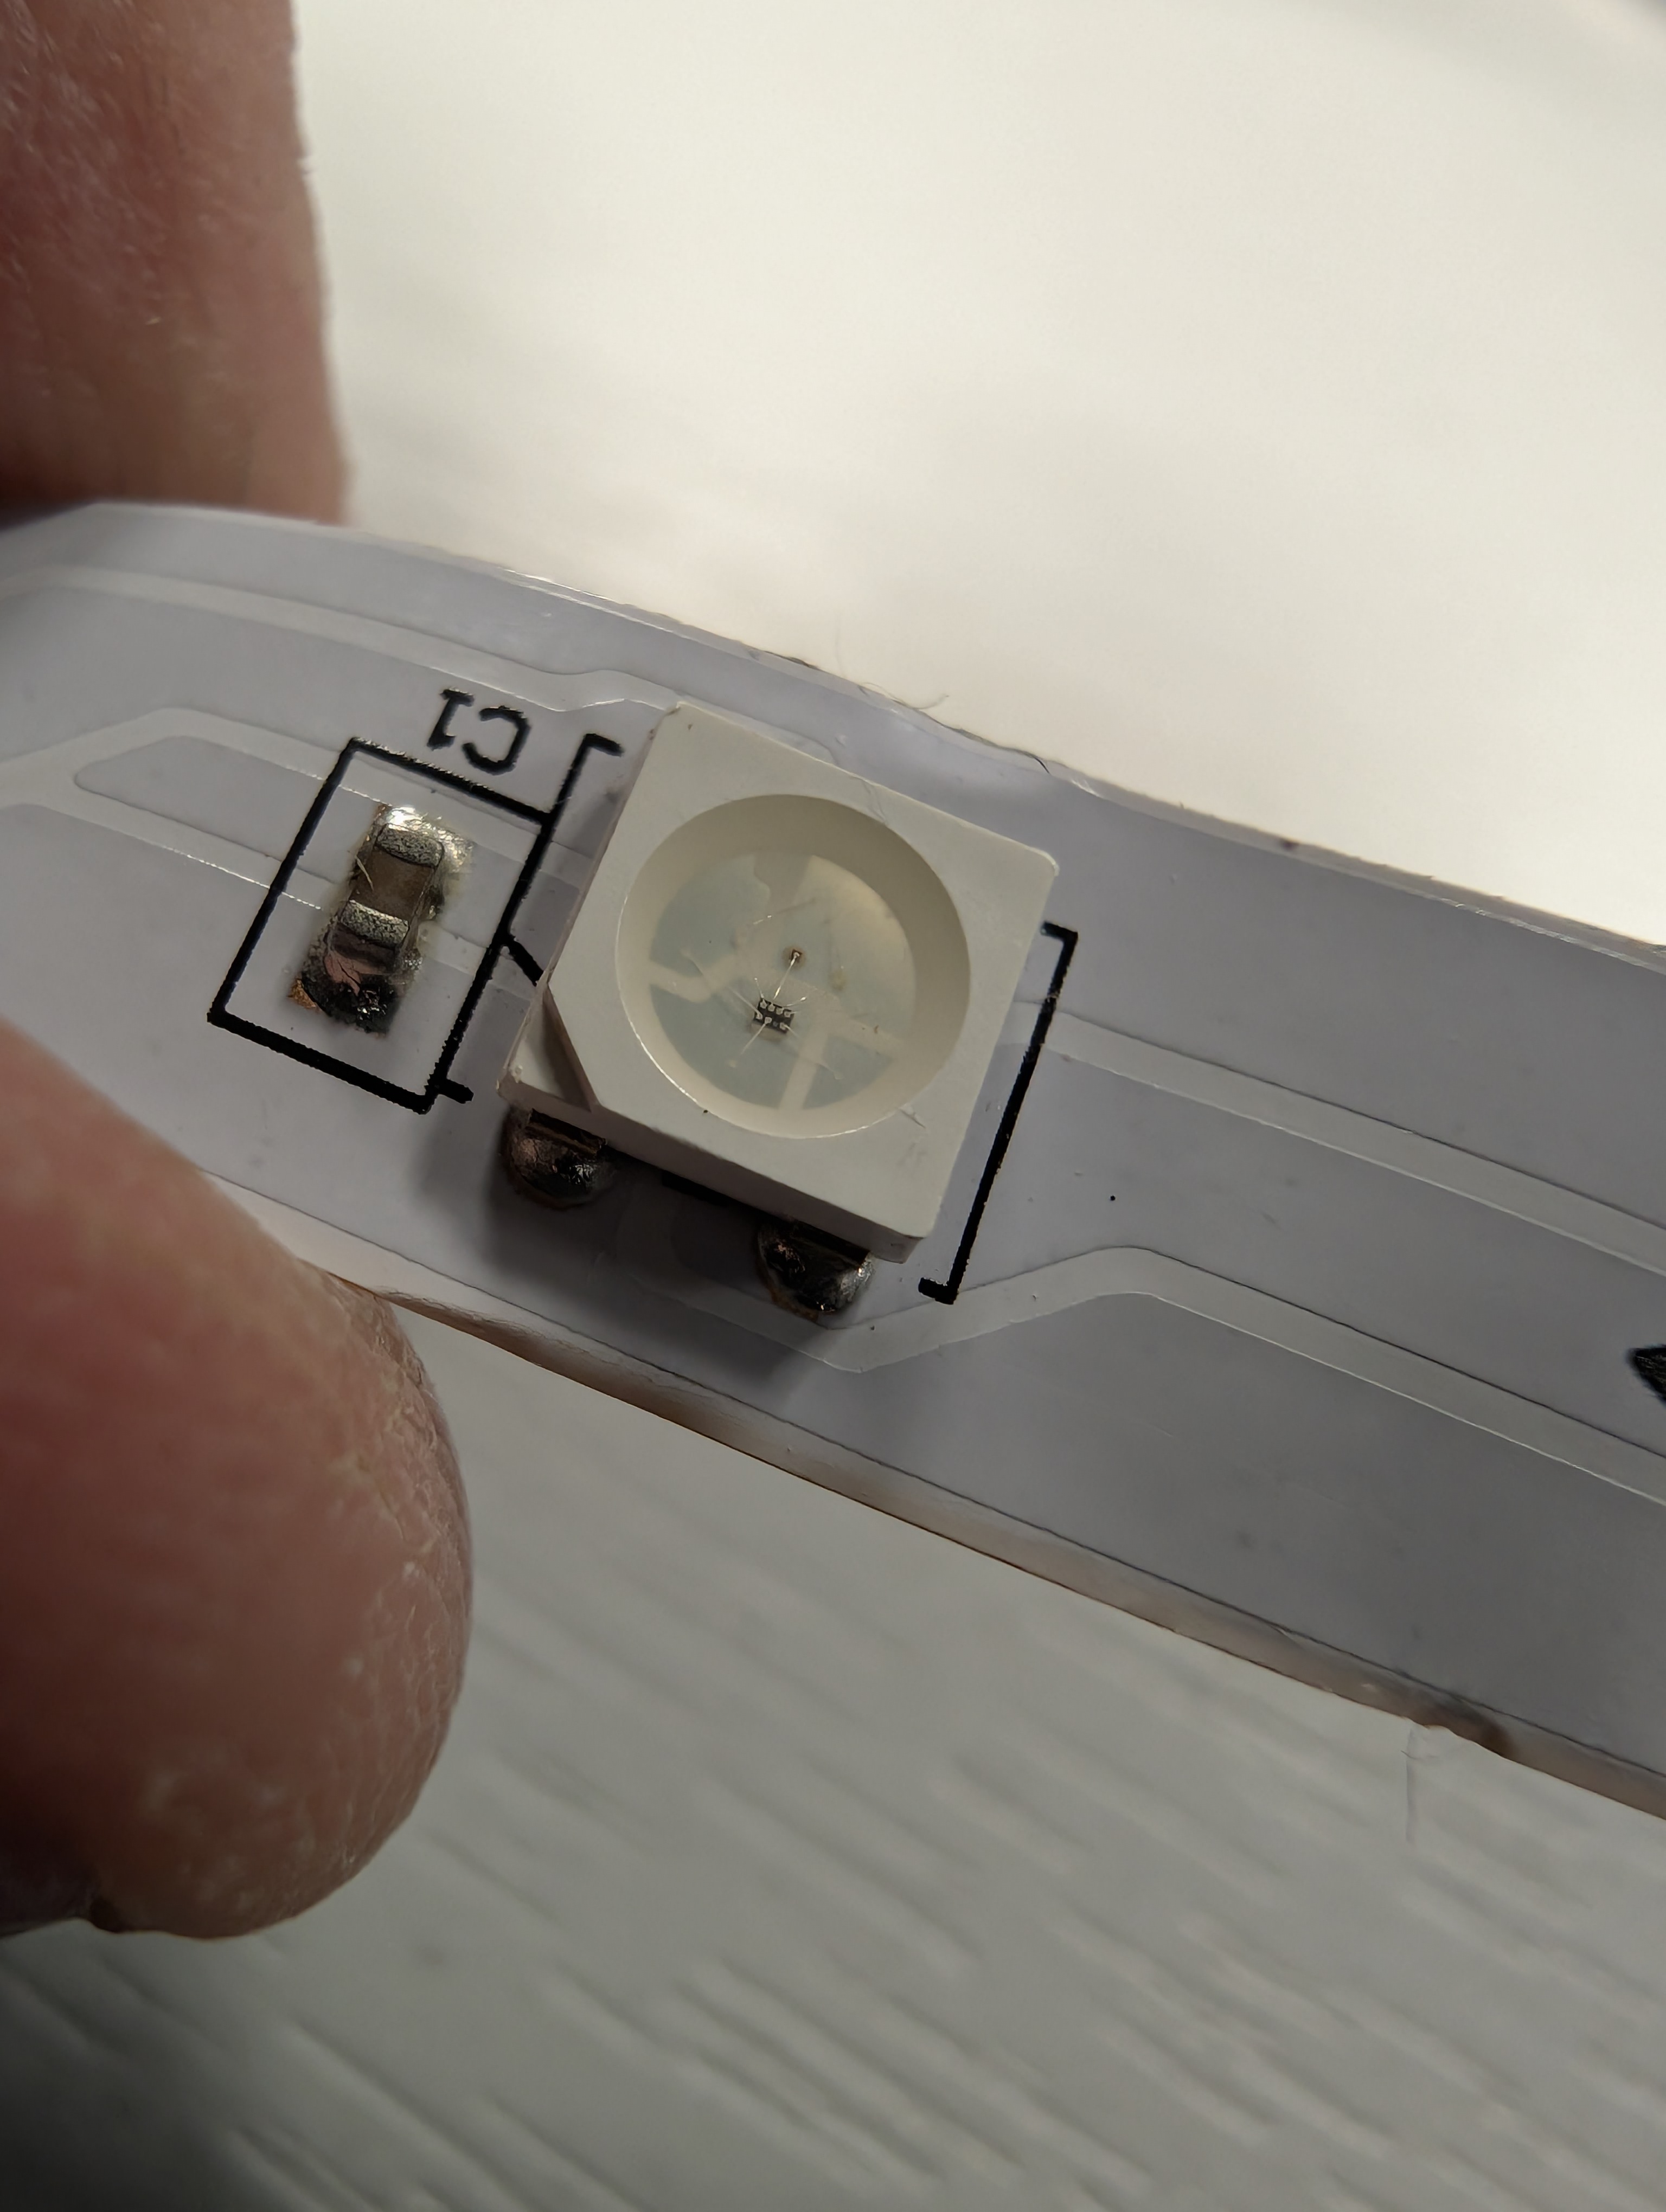
WS2812B close-up — you can see the tiny controller IC inside the LED and the C1 decoupling capacitor on the flexible PCB. Three copper traces carry GND, data, and 5V.
GND
Ground. The return path for electricity. Connects to GND on your Arduino.
DI (Data In)
The signal wire. Carries colour instructions to every LED, one after another down the chain.
5V
Power. Each LED draws up to 60mA at full white brightness. This adds up fast!
Look closely at the strip — there's usually a tiny arrow printed between each LED showing the direction of data flow. Data goes from DI (Data In) to DO (Data Out). Always connect your Arduino to the DI end.
2 What You Need
| Part | Notes |
|---|---|
| Arduino Uno | Any genuine or clone will work |
| WS2812B LED strip | Any length — start with 8–30 LEDs |
| 330Ω resistor | Goes on the data line to protect the first LED |
| 470µF capacitor (optional) | Across 5V and GND to smooth power spikes |
| Jumper wires | 3 wires: data, power, ground |
| USB cable | To program the Arduino |
| External 5V power supply | Needed if using more than ~8 LEDs (see power section) |
3 Cutting the Strip
The strip can be cut to any length at the marked copper pads between LEDs. You'll see three exposed copper rectangles labelled GND, DI/DO, and 5V — cut right through the middle of these pads with sharp scissors.
Always cut on the copper pads, never between them. If you cut the wrong spot you'll lose a LED and have nowhere to solder wires.
4 Wiring It Up
Connect Arduino GND to the strip's GND pad.
Connect Arduino 5V to the strip's 5V pad. (For more than ~8 LEDs, use an external 5V supply instead — see power section below.)
Connect Arduino Pin 6 through a 330Ω resistor to the strip's DI (Data In) pad.
Optional but recommended: Place a 470µF capacitor across the 5V and GND wires near the strip to absorb power spikes when the LEDs first turn on.
Power matters. Each LED draws up to 60mA at full white. A strip of 30 LEDs could pull 1.8A — far more than the Arduino's 5V pin can supply (max ~500mA). For strips longer than 8 LEDs, use a separate 5V power supply wired directly to the strip, with GND connected to the Arduino's GND too.
5 Install the Library
We'll use Adafruit's NeoPixel library — it works with all WS2812B strips and is the most beginner-friendly option.
Open the Arduino IDE
Go to Sketch → Include Library → Manage Libraries...
Search for "Adafruit NeoPixel"
Click Install on "Adafruit NeoPixel by Adafruit"
An alternative library is FastLED — it's more powerful with more built-in effects, but NeoPixel is simpler for getting started. You can always switch later.
6 Your First Sketch — All Red
Let's start simple: turn every LED red.
Key concepts:
strip.Color(R, G, B)
Sets a colour using Red, Green, Blue values from 0 to 255. (255, 0, 0) = red, (0, 255, 0) = green, (0, 0, 255) = blue.
strip.setPixelColor(n, colour)
Sets LED number n to a colour. LEDs are numbered from 0.
strip.show()
Pushes all your colour changes to the strip. Nothing visible changes until you call this!
7 Sketch 2 — Rainbow Chase
Now let's make something move. This sketch sends a rainbow cycling down the strip.
ColorHSV(hue) is brilliant for rainbows. The hue value goes from 0 to 65535 — covering the full colour wheel. No need to manually calculate RGB values.
8 Sketch 3 — Knight Rider (Larson Scanner)
The classic back-and-forth sweep — a single bright LED bouncing from end to end with a fading trail.
9 Power — The Maths
This is where most beginners get caught out. Each WS2812B LED can draw up to 60mA at full white brightness. Here's a quick reference:
| LEDs | Max Current | Power Source |
|---|---|---|
| 1–8 | ~0.5A | Arduino USB power is fine |
| 9–30 | ~1.8A | Separate 5V 2A supply |
| 30–60 | ~3.6A | Separate 5V 4A supply |
| 60–150 | ~9A | Separate 5V 10A supply + power injection |
Always connect GND between the Arduino and the external power supply. Without a common ground, the data signal won't work and you could damage the Arduino.
In practice, you'll rarely hit maximum draw because you won't run every LED at full white. Using setBrightness(50) cuts current by roughly 80%. But always size your power supply for the worst case.
10 Challenges — Try These!
Once you've got the basics working, have a go at these:
🟢 Beginner: Traffic Light
Use 3 LEDs. Make them cycle through red → amber → green → red, like a real traffic light. Add realistic timing (red longest, amber shortest).
🔵 Intermediate: Button Colour Picker
Add a push button. Each press cycles the whole strip through a list of colours: red → green → blue → white → off → red…
🟡 Intermediate: Cylon with Potentiometer
Wire up a potentiometer to control the speed of the Knight Rider sweep. Map the analog reading (0–1023) to delay values (20–200ms).
🔴 Advanced: VU Meter
Connect a sound sensor or microphone module. Map the sound level to the number of lit LEDs — quiet = few LEDs (green), loud = all LEDs (red at the top). Like a classic audio level meter.
🟣 Advanced: Festive Twinkle
Randomly pick LEDs and fade them in and out at different speeds, like fairy lights. Use millis() instead of delay() so multiple LEDs twinkle independently.
11 Troubleshooting
Nothing lights up
Check the data direction arrow on the strip — you might be wired to the DO (output) end. Also check your LED_COUNT and LED_PIN values match your wiring.
First LED is the wrong colour or flickers
Add the 330Ω resistor on the data line if you haven't already. This protects the first LED's data input from voltage spikes.
LEDs flicker or show random colours
Usually a power issue. Add the 470µF capacitor across 5V and GND. If using lots of LEDs, switch to an external power supply.
Only some LEDs work
Check LED_COUNT is set to the right number. Also check for cold solder joints if you've soldered the strip — data is serial, so one bad connection breaks everything after it.
Colours look wrong (e.g. red when you set green)
Some strips use a different colour order (RGB vs GRB). Try changing NEO_GRB to NEO_RGB in the strip constructor.